RSS
SUPER BOWL

Happy New Year's Eve


Yah, more justjohanna thanks ever so cards. I just couldn't help myself. I added orange Stickles to both sentiments. The card bases are from the Target Dollar Spot. On the top card I added a chipboard tag and ribbon from the T $ spot. The bottom card has a T chipboard and a flower brad from, guess where, the T $ spot. The orange and green cardstock are Prism scraps that I had.

  • Digg
  • Del.icio.us
  • StumbleUpon
  • Reddit
  • RSS

Lost Luggage has a new address and a sweepstakes

One of my favorite blogs on my feeds list is The Land of Lost Luggage. She's always posting something very creative and I consider her a technique guru. Well, Luggage has moved and she's holding a blog sweepstakes. The winner will receive a coupon for $75 off their next justjohanna order. Read all the details and enter here.

  • Digg
  • Del.icio.us
  • StumbleUpon
  • Reddit
  • RSS

Purple Thanks


These are some cheerful thank you cards that I made recently. I love this new Basic Grey patterned paper. I layered it on DCWV purple cardstock. I used justjohanna thanks ever so for both cards. In the top card I also used parts of justjohanna created for you by. I embellished the top card with a purple flower and pink bubble gum Stickles. The bottom thanks was colored with prismacolor pencils and embellished with some buttons from the fabric store. (Sorry, the scanner made the bottom card blurry.)

  • Digg
  • Del.icio.us
  • StumbleUpon
  • Reddit
  • RSS

Merry Christmas and the sweet dreams winner


Merry Christmas. Here are some fun pictures from around my house today. The handsome man on the left is my chocolate lab, Paris. The goofball in the apron is my niece. She put on her apron and stuffed the pockets with cookie cutters.

I really enjoyed reading everyone's wishes. I hope that they all come true in the new year. Congratulations to my sweet dreams winner, Tejal. Her wish: "My wish for the new year is to expand creatively...make more cards, try and push the boundries of what I create and not stick to conventional stuff.."

Thanks everyone for sharing your wishes. I'm already collecting goodies for the 10,000 hits sweet dreams. Have a wonderful holiday!

  • Digg
  • Del.icio.us
  • StumbleUpon
  • Reddit
  • RSS

Paper Mod Podge Product Review and Samples

I found this Plaid Paper Mod Podge at Michaels. I have a lot of experience using regular MP on altered papercrafts but thought I'd try this special MP. I love it! The first thing that I noticed is that as a glue, it dries faster than regular MP and the texture was less messy and easy to work with. And, its acid-free and non-yellowing. :)

I made four altered composition notebooks using the the PMP as the glue and sealer. The only issue that I had was on one of the back of the books where I used cheap cardstock. Some of the blue seemed to lift off and get on my foam brush. The rest of the books with patterned papers and better quality cardstock did not have a problem. Also, I would advise not stacking projects until you are 100% certain the sealant is dry. Oops. Otherwise, this was a really easy project.

Below are two of the books I made for my siblings.

Ethan book (age 5) Papers: Basic Grey Mellow, Letter Stickers: Wild Asparagus
DaRue book (age 11) Pink Distressed Paper: Bobunny, Letters and Borders: Wild Asparagus

*Oh, and something fun to check out: Craft Critique Holiday Carnival 1, 2, and 3. My Krispie pops are part of number 3. All three days are chock full of fun ideas for Christmas gifts and decorations.

  • Digg
  • Del.icio.us
  • StumbleUpon
  • Reddit
  • RSS

Christmas Krispie Pops


This is my Christmas version of my Krispie pops. I enjoy making these every year. This year I did a gingerbread man, gift, snowman and santa. They are sooooo easy. See my tutorial here.I made these for the gift exchange at work. So, for the first time, I packaged them individually. I used cellophane cut to fit and added a little double stick tape and ribbon to seal them. I think they would make a fun stocking stuffer too. If you make some, share your link with me. I'd love to see your version.

  • Digg
  • Del.icio.us
  • StumbleUpon
  • Reddit
  • RSS

Sweet Dreams (aka blog candy)!!!


I'm really excited about hitting the 5000 hits mark. To celebrate, I'm offering my readers a little sweet treat. Please post a comment telling me a wish that you have for the new year. I'll randomly choose a winner of my sweet dreams collection including: Heidi Grace clear stamp, Art Warehouse clear stamps, and a bunch of ribbon including double faced satin, printed, rattail, and poofball. The winner will also recieve a homemade card from me. Deadline to enter your comments is Monday, December 24th at 9 p.m. my time. Good luck!

  • Digg
  • Del.icio.us
  • StumbleUpon
  • Reddit
  • RSS

I hit 5000!

Wow, I can't believe I've had over 5000 hits. So, tomorrow (Wednesday) I will be offering some sweet dreams (aka blog candy) for my loyal readers. More details in tomorrow's post.

And, as another treat, I made my Christmas Krispie pops today and took pictures for you. And, I wrapped them cute so you can get a fun gift idea.

  • Digg
  • Del.icio.us
  • StumbleUpon
  • Reddit
  • RSS

A Couple justjohanna Tree Cards


I love justjohanna lacy border. I can use this stamp for anything. Here, I used it to make the scallops for my Christmas trees. I just alternated TAC Native Land and TAC Pine Tree inked lacy borders. I made my own template for the tree shape. Then, I cut out the tree and added Stickles to the outside edge and about every other scallop. I freehand cut out the trunk from a scrap of Provo Craft paper then stamped justjohanna pierre le bunny (side), floral florish left and owl fred-big with TAC Pine Tree ink onto background white cardstock. The inside sentiment is justjohanna Joy to the World.
Come back tomorrow for something extra special. :)

  • Digg
  • Del.icio.us
  • StumbleUpon
  • Reddit
  • RSS

Another Countdown to Christmas


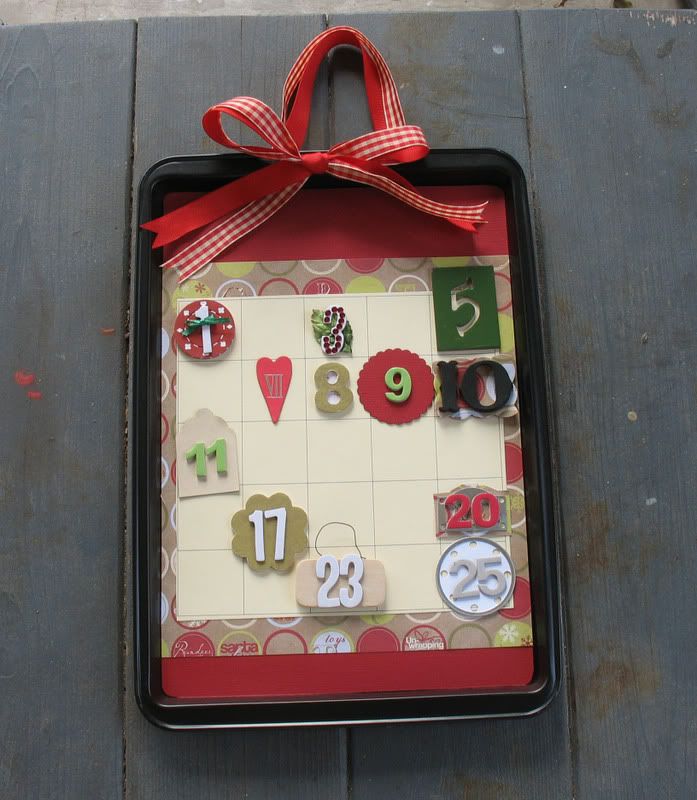
Isn't this awesome! Yes, it's another cookie sheet advent calendar. But, this one is different. I participated in a cookie sheet advent calendar number swap. There were 8 participants. Each of us made 8 copies of 3 different numbers (except the hostess who made 4.) Some of the numbers came out fabulous. Number 10 was too big for my cookie sheet so I had to replace it with a domino. I'll find another use for number 10.
The Christmas title is a red wooden cutout from M's $1 bin that I added clear Stickles too. My favorite part is the black pom pom border at the bottom.

  • Digg
  • Del.icio.us
  • StumbleUpon
  • Reddit
  • RSS

Are you ready for Christmas?

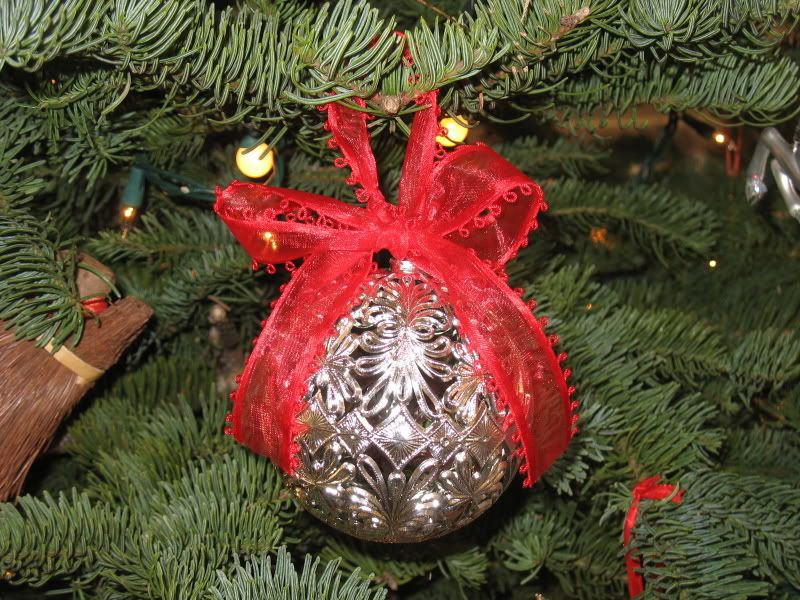
I'm not. But, I did work on these ornaments for my mum. I bought the antique, plastic silver ornaments in a box of 6 at the Goodwill store. They had tacky, plastic ribbon on them so I went the Michaels and bought some pretty ribbon, tied them up and voila, instant charm.

I am going to try to go back to Goodwill today. There are always new treasures to discover.

  • Digg
  • Del.icio.us
  • StumbleUpon
  • Reddit
  • RSS

Funky Star Card


What? Another origami card? Yep. This one is my more funky style. The front flap lifts up for the message. The sentiment is justjohanna joy to the world and the border is justjohanna created for you by. I only inked the dashed line. I stamped it kind of crooked to look more funky. Then, I used my lumocolor black marker and added some doodled stars. The patterned paper is BoBunny. I don't know how well it works as a Christmas card but I think it's kinda cool.

  • Digg
  • Del.icio.us
  • StumbleUpon
  • Reddit
  • RSS

Wreath on an old door card


I've been totally inspired by Tim Holtz's blog today. So, I made this card with his tag in mind. I don't have his distress crackle paint (it's on my very long wish list) so I used Delta Creamcoat in buttercream on regular cardstock. I brushed it on fully but unevenly and very thick in some spots, then dried it with my heat gun. I used my Making Memories sponge brush to apply Tim Holtz Distress Ink Walnut Stain all over the painted cardstock. I let it dry then glue dotted leaves punched from my Target Dollar Spot leaf punch in a circle. I added a bow made from ribbon from Big Lots. Lastly, I placed Thickers on the bottom and used crystal Stickles to give them sparkle. I mounted everything onto a white card.

  • Digg
  • Del.icio.us
  • StumbleUpon
  • Reddit
  • RSS

Green Greetings

There's a whole lotta green going on on this card. I used justjohanna lacy border (which I added Stickles to the dots) and justjohanna joy to the world which I stamped in TAC pine tree. The paper is from a Provo Craft Christmas slab that I am enjoying.

  • Digg
  • Del.icio.us
  • StumbleUpon
  • Reddit
  • RSS

Holly Berries Chrismas Card


I've had more fun with origami. This one is a holly leaf. I added red fuzzballs for berries. The scalloped border is justjohanna lacy border in red StaZon ink. The origami directions were in Japanese and I'm pretty proud of myself for figuring them out.

  • Digg
  • Del.icio.us
  • StumbleUpon
  • Reddit
  • RSS

Silent Night


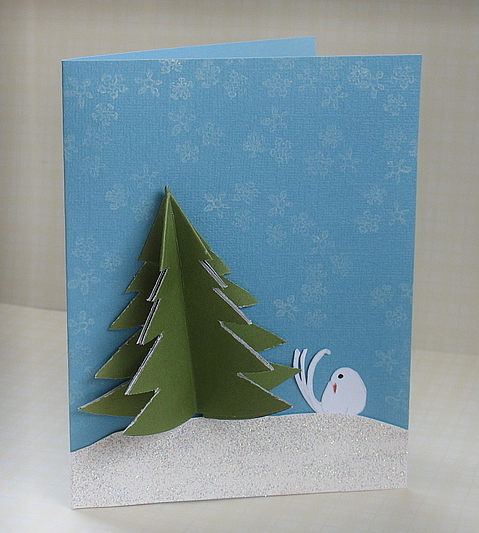
I am loving these origami trees. I paired this one with justjohanna sleeper left and justjohanna snowflake trio. I made the snow by spreading Top Boss embossing ink onto white paper, sprinkling with sparkly white embossing powder and heat embossing. I cut it out and adhered it to the light blue card. I stamped sleeper with TAC Gray Stone ink and colored the beak with Prismacolor pencils and used my black Glaze pen for the eye.

  • Digg
  • Del.icio.us
  • StumbleUpon
  • Reddit
  • RSS

Big News!


Johanna posted the list of the new justjohanna Design Team members. Guess what. I'm on it! Woo Hoo! I'm super excited to be a part of this amazing group of stampers. I'll post some of my newest creations using justjohanna stamps very soon.

  • Digg
  • Del.icio.us
  • StumbleUpon
  • Reddit
  • RSS

I'm Getting Organized!


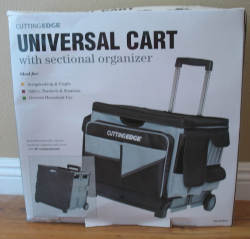
I just thought you might enjoy a look at my newest attempt to get organized. First, I found this awesome cart at Costco a few weeks ago for $29.99. In the inside, I store upright a couple of the 12 x 12 paper cases that I bought at Michaels. Then, I fill the rest of the space on the inside and all the gazillions of pockets on the outside with tools, embellishments and all kinds of other stuff like ink pads.


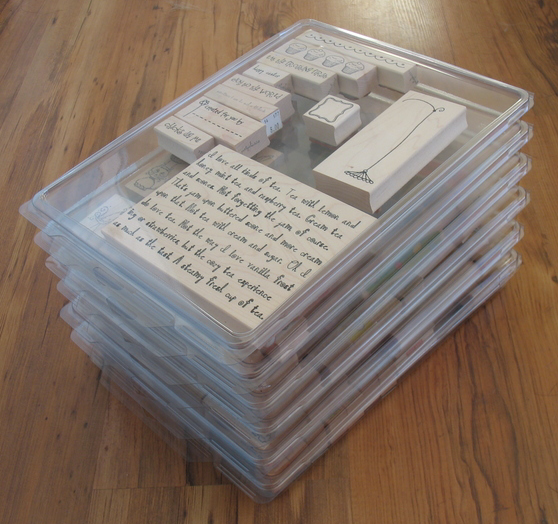
Secondly, I was really getting sick of searching through shoeboxes for my mounted stamps. I purchased these 8 1/2 x 11 clear containers from Shabby Cat Creations Ebay store. I bought six but I can tell I'm going to need more very soon. I organized them by theme. I love them because I can see all my stamps and they stack and take up next to no room.

  • Digg
  • Del.icio.us
  • StumbleUpon
  • Reddit
  • RSS

3d Christmas Tree with Tutorial

This is a super fun 3d tree. I got the idea from an old issue of Pack-O-Fun Magazine.

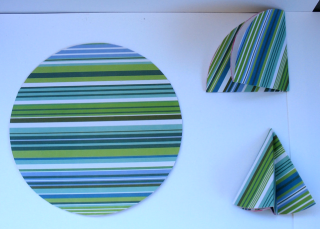
Step 1: Using a circle cutter or trace a plate and use scissors, cut out a 6 inch circle of patterned paper.

Step 2: Fold the circle in half and then in half again.

Step 3: Fold the quarter circle into thirds, radiating from the point.
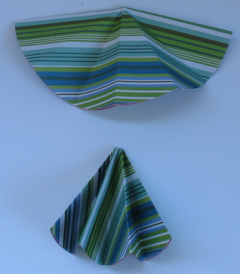
Step 4: Open up paper so it is a half circle again. Now, fan-fold along previously folded lines.
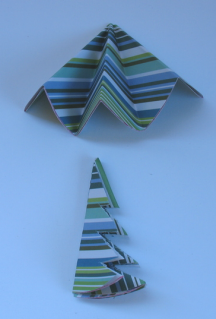
Step 5: The top picture shows the fold that you do NOT cut on. You want the 2 folds and 2 ends side. Using sharp scissors, cut 3 v's like the bottom picture.
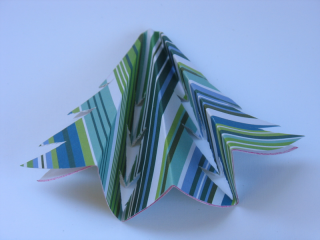
Step 6: Here's a picture of the back. Place some adhesive in the folds.

Step 7: Flip your tree over and adhere it to card front.

Paper: Provo Craft, Stickles.

Optional idea: Make 2 trees and adhere together. Thread string through the top and use as an ornament or on top of a gift.

  • Digg
  • Del.icio.us
  • StumbleUpon
  • Reddit
  • RSS

Same Stamp. Same Ink. Two Looks.

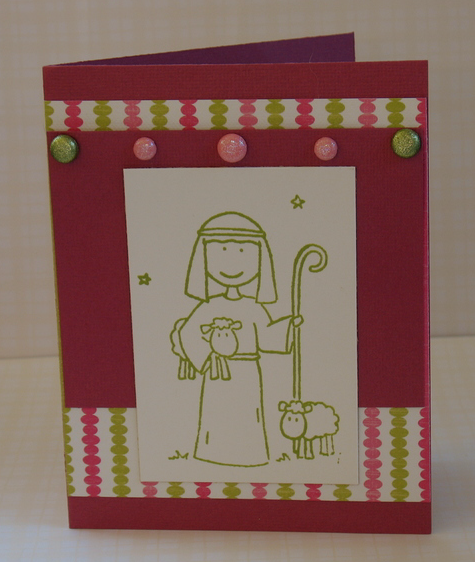
Pink and Green Shepherd

I LOVE this Elzybells Art Stamps Shepherd.  This is the one I ordered from the UK site. Cardstock: Bazzill Basics, Patterned Paper: K & Company, Ink: TAC-Native Land, Sparkly brads: Making Memories.

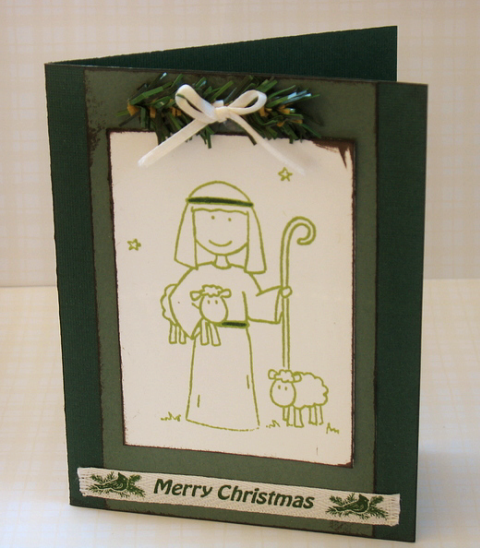
Green Shepherd

  Here he is again. I colored his belt and headband with my Olive Green Marvy Brush Marker. Cardstock: Die Cuts With a View (card base), Prism (lighter green), Twill ribbon: Ribbon Bowtique, Satin ribbon: from my stash, Inked edges: Tim Holtz Distress Ink-Walnut Stain, Other: faux evergreen twig attached with glue dots.
Tomorrow I'll have a 3d Christmas tree card with a tutorial. It's even easier than the origami tree. :)

  • Digg
  • Del.icio.us
  • StumbleUpon
  • Reddit
  • RSS

Elzybells Red and White Christmas Hello


When I saw Marie Kirkwood's ribbon tree on the Stamp Shack, I knew I would have to give it a try. Heaven knows I have ribbon scraps. I put a sparkly heart at the top of the tree from the Target dollar spot. The image and sentiment are Elzybells. The skater girl was an image RAK from my Shack friend, Sherri. The "hello" was a suprise from Elizabeth (Elzybell) in my package from the UK site. I am super happy with my order. I'll post a card with my amazingly adorable shepherd stamp very soon.

  • Digg
  • Del.icio.us
  • StumbleUpon
  • Reddit
  • RSS

Quick, Inexpensive Christmas Card and Invitation Idea

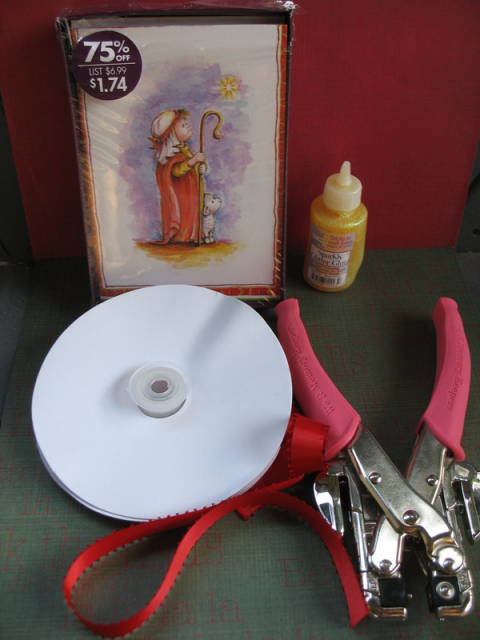
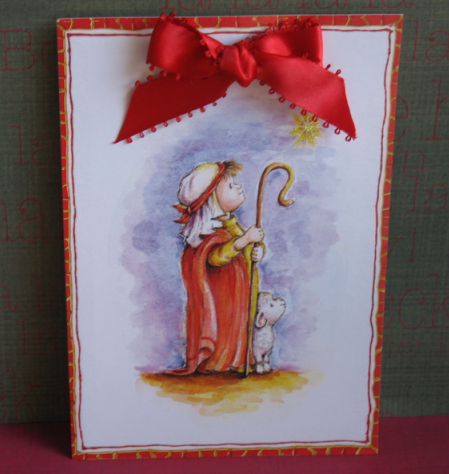
Here's a way to easily transform cheap store-bought Christmas cards into pretty Christmas cards or invitations.

Easy Christmas Cards

You'll need: A box of plain, store-bought Christmas cards (I paid $1.74 for 18 cards), Glittery glue, ribbon and a Cropadile.

Step 1: Open up all the cards and stack them face up.

Step 2: Punch two holes on the top of each card.

Step 3: Apply Glittery Glue to the item you want to highlight (I did the star).

Step 4: Cut ribbons to desired length, thread through holes and tie bow.

Invitations

To make an elegant and easy invitation, follow steps above except after step 1, cut the back flap off the cards (so it's like a postcard). And, after step 2, measure your card. Using your word processor program design text for back of card. Print. Then, continue with steps 3 and 4. I made 150 of these babies for our church Christmas party. They were a lot easier than the 2 layer invites with a punched border that I made last year.

  • Digg
  • Del.icio.us
  • StumbleUpon
  • Reddit
  • RSS

Origami Christmas Tree Tutorial

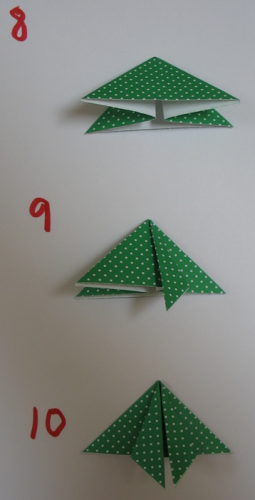
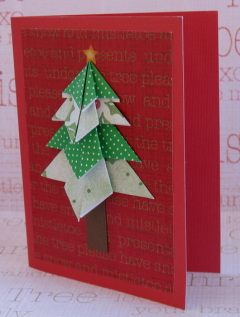
If you are like me and you need very specific instructions, this tutorial is for you.To make the origami tree you'll need patterned paper cut to the following sizes: 3" x 3", 2 1/2" x 2 1/2", 2" x 2" and 1 1/2" x 1 1/2". You will follow the steps below with all 4 pieces of paper.

Step 1: fold paper in half. Step 2: Open. Step 3: fold diagonally then open.

Step 4: Fold diagonally the other way. Step 5: Open Step 6: Fold in half along the step 1 fold.

Here's where it gets a little tricky. Step 7: Press the right side of the top fold down. Do the same to the left side.

You have formed a triangle, as seen in number 8. Step 9: Take the top layer's triangle tip from the bottom right and fold it towards the center and down. Step 10: Do the same to the right triangle tip. Now, do the 10 steps with the other 3 squares and stack them, adding a little adhesive to each top triangle tip. You can add a star, trunk, ornaments, a tree skirt, gifts, whatever. Have fun!
  • Digg
  • Del.icio.us
  • StumbleUpon
  • Reddit
  • RSS

3 More Cards

These are three more samples for the easy card class I'm teaching tonight. Enjoy!

Vintage Christmas Card

Patterned paper and sentiment stickers: DaisyD's, Velvet ribbon: Ribbon Bowtique and red sparkly cardstock.
Origami Christmas Tree Card

I saw several versions of this card on Splitcoast Stampers and several had instructions but written instructions totally go over my head so I'll post a tutorial with pictures this week. I used a bunch of papers that have been in my stash for a while including Provo Craft and Making Memories. The star on top is a Creative Memories sticker.

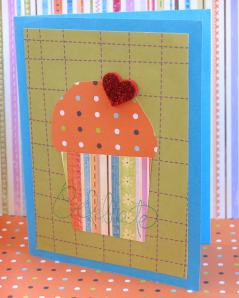
Fun Cut Out Cupcake Card

I don't know if anyone at the class will like it but I think it's fun. The wrapper is crimped for texture and the sparkly heart was a sticker from Target Dollar Spot. The Stampin Up! Celebrate stamp looks like a signature on artwork to me. I freehand cut out the cupcake and wrapper. Kinda funky. We'll see.
  • Digg
  • Del.icio.us
  • StumbleUpon
  • Reddit
  • RSS

Wow! 3 Cards Posted In One Day?

I'm teaching an easy card class at church this Tuesday. I'll be making several samples and put together kits for those cards but I will also let the ladies play with my scraps and stuff.  Here's the first 3 samples:

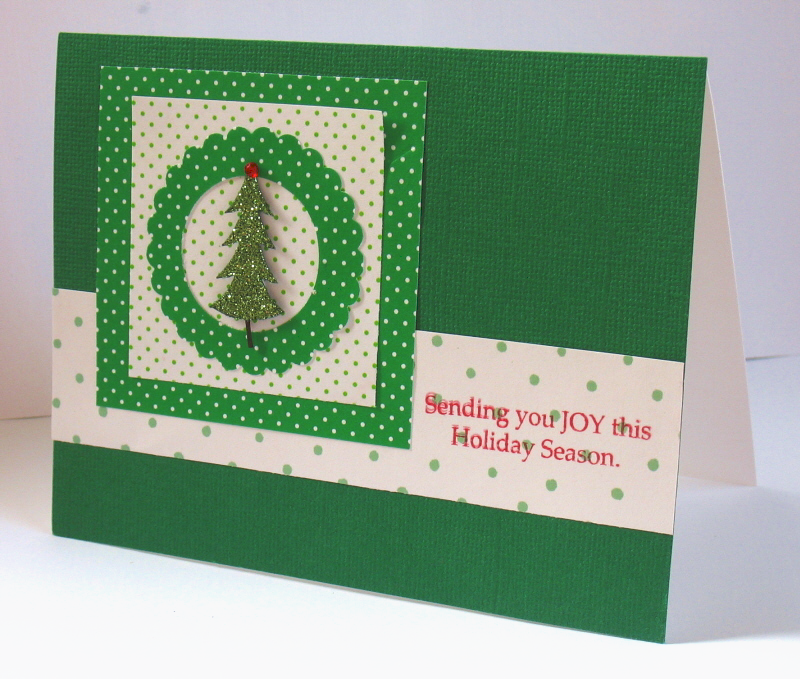
Christmas Tree Card

Cardstock: Prism, Dot papers in squares: Making Memories, in strip: Gooseberry Patch, Ink: StaZon, Stamp: Hero Arts, Sparkly tree sticker: Jolee's. I used a scallop circle punch then punched the regular circle out to make a wreath.

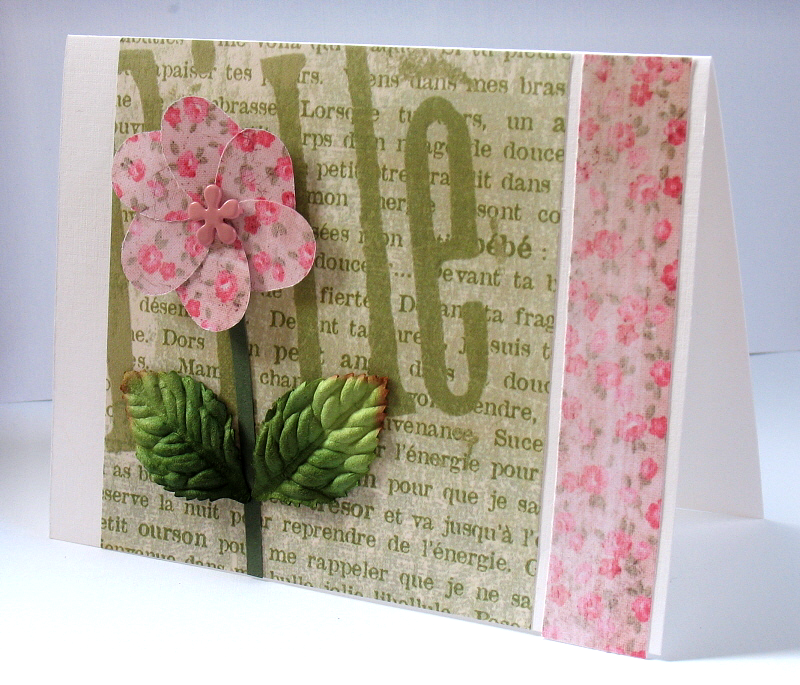
Baby Girl Card

Paper leaves: Prima, brad: ProvoCraft, Cardstock: Prism, Fille (girl in French) paper: purchased in Paris, Pink flower paper: DaisyD's. I used the Fold-It Large 6-petal Flower punch to make the flower.

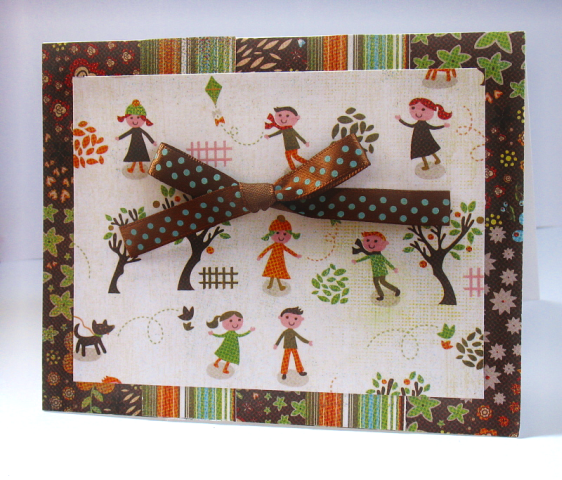
Basic Grey Mellow Card

Paper: BG Mellow Cultured, Ebb, and Settle Down, Ribbon: Target Dollar Spot. I might still do more like add a sentiment to the corner but I was really trying to make this one super easy.

  • Digg
  • Del.icio.us
  • StumbleUpon
  • Reddit
  • RSS

Cookie Sheet Advent Calendar (Done!)


I'm still going to tinker with it before my class next Saturday. I lucked out and found black cookie sheets at the 99 cent store. I used my cropadile to poke holes in the top for the ribbon. The patterned paper is Imaginescense. I'm going to be making a few of these to give away as Christmas gifts this year. I am participating in a cookie sheet advent calendar number swap on 2peas and I am going to do a vintage red/white/black for my background.


If you want to make a cookie sheet advent calendar, I can email you the calendar grid. You'll need Microsoft Word and you just print it onto 8 1/2 x 11 paper.

  • Digg
  • Del.icio.us
  • StumbleUpon
  • Reddit
  • RSS

Cookie Sheet Advent Calendar (Work in Progress)

I'm teaching a Cookie Sheet Advent Calendar class at the Scrapbook Garden on November 10th. Here's a preview.

  • Digg
  • Del.icio.us
  • StumbleUpon
  • Reddit
  • RSS

Something For You, Something For Me


No tutorials today, I have a couple fun treats instead. First off, I am participating in a Pay It Forward challenge. Robyn from The Pink Stamper is sending me and 2 other bloggers a package of goodies. I in turn will send 3 lucky blog readers packs of goodies. If you'd like to join the fun and 1) you have a blog 2) you live in North America 3) you are the first of 3 volunteers to sign up below and 4) you commit to sending goodies from your home to 3 other bloggers then leave a comment on this post expressing your interest.


Next, I have been nominated by 2 blogger friends for the You Make Me Smile Award. Thanks Allison from Stampin When I Can who always keeps me up to date with the blog world and Barb from Barb's Card Creations and Other Stuff who always has something fun to share and hosted a super fun game of card Bingo. I'd like to nominate Angie from {Stampings of the Shug}. Angie/Shuggy posts some funny comics and random thoughts and always takes me down memory lane when she hosts her Saturday Night Shuggy Snacks contest. Oh yah, and she makes great cards and things too.

  • Digg
  • Del.icio.us
  • StumbleUpon
  • Reddit
  • RSS
Related Posts Plugin for WordPress, Blogger...